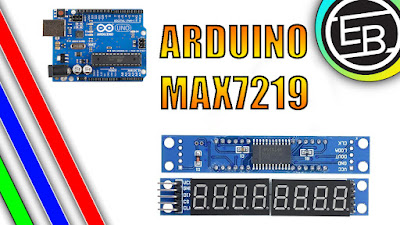
How To Make Arduino Stopwatch Using Max7219 Seven Segment Display
Arduino Code: MAX7219 connections:
-------------------------------------
MAX7219 chipKIT Uno32
VCC ---------------> 5.0V
DIN ---------------> Pin 7
CLK ---------------> Pin 6
LOAD ---------------> Pin 5
GND ---------------> GND
#######################################################
Start/Stop tact switch is connected to INT0 (Pin 38) pin.
This software is licensed under a
Creative Commons Attribution-ShareAlike 3.0.
*/
// Pin 7 to Data In, 6 to Clk, 5 to LOAD
LedControl lc=LedControl(7,6,5,1);
int fsec, sec, minute, i, Start;
long previousMillis = 0;
long interval = 100;
void setup()
{
// the zero refers to the MAX7219 number, it is zero for 1 chip
lc.shutdown(0,false);// turn off power saving, enables display
lc.setIntensity(0,15);// sets brightness (0~15 possible values)
lc.clearDisplay(0);// clear screen
fsec = 0;
sec = 0;
minute = 0;
Start = 0;
lc.setChar(0, 2,'-',false);
lc.setChar(0, 5,'-',false);
Disp_Data();
attachInterrupt(0, Button_Pressed, FALLING);
}
void loop()
{
if(Start == 1) {
unsigned long currentMillis = millis();
if(currentMillis - previousMillis > interval) {
// save the last time you blinked the LED
previousMillis = currentMillis;
fsec = fsec+10;
if(fsec == 100) {
fsec = 0;
sec = sec+1;
if (sec == 60) {
sec = 0;
minute = minute+1;
if(minute == 100) minute = 0;
}
}
Disp_Data();
}
}
}
void Button_Pressed(){
if (Start == 1) {
Start = 0;
}
else if (Start == 0){
Start = 1;
}
}
void Disp_Data(){
int ones, tens;
// First display fsec
ones = fsec%10;
tens = (fsec/10)%10;
lc.setDigit(0,1,(byte)tens,false);
lc.setDigit(0,0,(byte)ones,false);
// Now display sec
ones = sec%10;
tens = (sec/10)%10;
lc.setDigit(0,4,(byte)tens,false);
lc.setDigit(0,3,(byte)ones,false);
// Next display mm
ones = minute%10;
tens = (minute/10)%10;
lc.setDigit(0,7,(byte)tens,false);
lc.setDigit(0,6,(byte)ones,false);
}


0 Comments